
UPDATE 8-22-16: This post has been updated to use Angular 2 version 2.0.0-rc.5. It was originally written against the API provided by Angular 2 version 2.0.0-rc.4, but as Tom Nurkkala pointed out in the comments, the relevant API from version 2.0.0-rc.4 has been deprecated.
UPDATE 9-24-16: A more succinct variation of this example has been added here. For a brief explanation of this variation, see the Afterwards section below.
Building components on the fly at runtime is not uncommon, but you won’t find a recipe for it in Angular 2’s official cookbook just yet. In this post, we fill the gap by working through an example. A dialog box is a good example of an Angular 2 component you may want to build on the fly. If your application has a fair number of them (like Lucidchart does), and you feel put out at the thought of writing one largengSwitch, then building them dynamically is a good alternative.
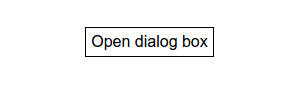
We will build a simple dynamic dialog box for our example. (Check out the completed example.) Here is our initial app:
@Component({
    selector: 'my-app',
    template: `
        <div class="open-button" (click)='openDialogBox()'>Open dialog box</div>
    `,
    styles: [`
        :host {
            display: flex;
            justify-content: center;
        }
        .open-button {
            padding: 5px;
            border: 1px solid black;
            cursor: pointer;
        }
    `],
    directives: []
})
export class AppComponent {
    openDialogBox() {
        // TODO: Open up a dialog box
    }
}
ViewContainerRef class, which provides a handy createComponent method. It is hard to describe a ViewContainerRef in familiar terms, but here is what we need to know about it:
- The
ViewContainerRefcan be informally thought of as a location in the DOM where new components can be inserted. - Internally, this insertion location is specified by a DOM element referred to as the "anchor element."
- When a new component is created using the
createComponentmethod, the resulting component's DOM gets inserted as a sibling to the anchor element.
ViewContainerRef in our example:
- We'll pick a spot (i.e., an element) in the
AppComponent's template where we would like to insert our dialog box, and we'll set up a newViewContainerRefthere. - We'll use the
ViewContainerRef'screateComponentmethod to build and insert our dialog box at that location.
Setting up the insertion location
Looking at the AppComponent’s template, there aren’t many elements to pick from for our insertion location—there is only one div. Let’s just add another div and use it:
...
    template: `
        <div></div>
        <div class="open-button" (click)='openDialogBox()'>Open dialog box</div>
    `,
...
We can attach a ViewContainerRef to this div by adding a directive to it that has been injected with a ViewContainerRef. Here is our directive:
@Directive({ selector: '[dialogAnchor]' })
export class DialogAnchorDirective {
    constructor(
        private viewContainer: ViewContainerRef,
    ) {}
}
Here, we’ve added the directive to the div:
...
    template: `
        <div [dialogAnchor]></div>
        <div class="open-button" (click)='openDialogBox()'>Open dialog box</div>
    `,
...
DialogAnchorDirective is created, it gets injected with a ViewContainerRef whose anchor element is set to our newly added div. Our dialog box's DOM will get inserted as a sibling to this div.
Using createComponent
We need to provide some way to actually use DialogAnchorDirective’s viewContainer to build our dialog box. We will do this by adding the following method to the DialogAnchorDirective:
...
    createDialog(dialogComponent: { new(): DialogComponent }): ComponentRef {
        this.viewContainer.clear();

        let dialogComponentFactory =
          this.componentFactoryResolver.resolveComponentFactory(dialogComponent);
        let dialogComponentRef = this.viewContainer.createComponent(dialogComponentFactory);

        dialogComponentRef.instance.close.subscribe(() => {
            dialogComponentRef.destroy();
        });

        return dialogComponentRef;
    }
...
There is quite a bit going on here, so we will break it down, but before we do, this method has one small dependency we need to set up first. It is the componentFactoryResolver helper variable, which we need to add to our DialogAnchorDirective:
...
    constructor(
        private viewContainer: ViewContainerRef,
        private componentFactoryResolver: ComponentFactoryResolver
    ) {}
...
With that out of the way, let's start with the method signature:
createDialog(dialogComponent: { new(): DialogComponent }):ComponentRef<DialogComponent> { ... }
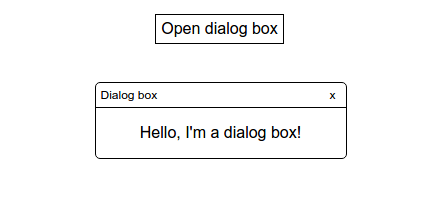
DialogComponent, and we get back a ComponentRef for the new component. (Note that the DialogComponent is the custom dialog box component we keep referring to. We don’t provide a listing for it here, but you can take a look at it in the full demo. Just know that it requires no special setup to be dynamically built.)
This line removes any already-open dialog boxes:
this.viewContainer.clear();These lines are where the component is actually created:
let dialogComponentFactory =
    this.componentFactoryResolver.resolveComponentFactory(dialogComponent);
let dialogComponentRef = this.viewContainer.createComponent(dialogComponentFactory);
DialogComponent type to a ComponentFactory using the newly added componentFactoryResolver. The factory then gets passed to ViewContainerRef’s createComponent method which builds, inserts, and returns a reference to the new dialog box component.
Next, we set up a listener to an event that gets fired when the user tries to close the dialog box:
dialogComponentRef.instance.close.subscribe(() => {
    dialogComponentRef.destroy();
});
Finally, we return the ComponentRef for the newly inserted dialog box component:
return componentCreated;The last bit of setup is done in the AppComponent. First, we must indicate that the AppComponent dynamically builds DialogComponents. We do this using the entryComponents option in the @Component annotation:
@Component({
    selector: 'my-app',
    template: `...`,
    styles: [...],
    directives: [DialogComponent, DialogAnchorDirective],
    entryComponents: [DialogComponent]
})
Lastly, we query for AppComponent’s child DialogAnchorDirective and use its createDialog method to complete AppComponent’s openDialogBox method:
export class AppComponent {
    @ViewChild(DialogAnchorDirective) dialogAnchor: DialogAnchorDirective;

    openDialogBox() {
        this.dialogAnchor.createDialog(DialogComponent);
    }
}
Afterwards
One of the main advantages of using a dedicated directive likeDialogAnchorDirective is that it can be injected into subcomponents. For some use cases, this may not be necessary, so a pithier example, which eliminates this extra directive altogether, can be found here. In that example notice how we access a ViewContainerRef on a div using the @ViewChild's "read" API.
This is the second in a series of posts about Angular 2. The first is titled Angular 2 Best Practices: Change Detector Performance.