Key takeaways
-
The critical path method (CPM) prioritizes the most critical tasks to keep projects on track and on time.
-
The CPM enables you to better manage resources, visualize dependencies, and plan for the future.
-
Steps of the critical path method include establishing all the deliverables within a project, defining the sequence of activities, creating an activity network diagram, determining the activity completion time, identifying the critical path, and then updating the critical path progress.
Everything you do is part of a process—a series of steps or tasks that get you a desired output or help you to reach a specific goal. Some processes are more rigid and require you to follow a series of steps in strict order. Other processes might be more relaxed, allowing you to complete tasks out of sequence to achieve the desired output.
The tricky part of any process is deciding where to prioritize each task. When prioritizing tasks, you’ll want to look at the dependencies, the tasks that must be completed before the next one can start.
The critical path method can help you to identify and prioritize your most important tasks and dependencies. Knowing which tasks are most important and in which order they must be completed helps you to create a critical path for your project.
What is the critical path method?
If your team is like most, you have several projects competing for attention with multiple contingencies and fixes looming on the horizon. The critical path method (CPM), or critical path analysis, is a technique for scheduling complex projects that was developed in the 1950s. The technique lets you identify the most important (or critical) activities and their dependencies to keep initiatives on track and on time.
What is the critical path in project management?
Project managers for all types of projects (software development, construction, manufacturing, engineering, etc.) use CPM to prioritize critical tasks, identify dependencies, and estimate the duration of each task. This lets them create more realistic schedules for completing the overall project.
The longest sequence of these critical tasks and their dependencies represents the critical path for the project. Other activities that are important to the project, but don’t have dependencies, can be completed out of sequence or in parallel with the critical path.
How does CPM differ from PERT?
The program evaluation and review technique (PERT) is another scheduling tool that was developed in the 1950s. Like CPM, PERT is used to identify the tasks needed to complete a project, but its focus is more on estimating the amount of time needed to complete each task and the overall minimum time needed to complete the entire project.
PERT estimates the time it takes to complete each task by using the weighted average of the most optimistic estimate (O), the most pessimistic (P), and the most likely (M).
The main difference is that PERT uses uncertainty to estimate task durations while CPM is used after durations have already been estimated. So you might see PERT being used in conjunction with CPM.
Why is it so important to define the critical path?
Any given project might have multiple processes comprised of multiple tasks. If you don’t identify the project’s critical path, you might spend too much time on side activities that could be completed at any time. This could cause delays that might jeopardize your project.
For example, let’s say you have the goal of getting to work on time. The process breakdown might be as simple as:
-
Wake up early enough to get ready.
-
Take a shower.
-
Get dressed.
-
Eat breakfast.
-
Get to the train station.
-
Get on the right train.
-
Get off at the right stop.
Each task comes with its own process and set of tasks. For example, the getting dressed process might include putting on your shirt, pants, socks, and shoes.
These are the most important tasks you need to do so you leave your house clothed. These tasks do not need to be followed in a particular order. The only dependency seems to be that the socks need to be on before the shoes.
In this process, you have allotted a certain amount of time for getting dressed. Some days you might get dressed faster than other days. This means you might have some extra time (slack or float) to work on a parallel task, such as putting on a belt, before you need to move to the next task.
There might be other tasks associated with getting dressed, such as putting on a tie, a hat, or a jacket. These tasks can be completed during slack time or later in the process. For example, you might put on a tie as you ride the train. But if you spend too much time picking out a tie, you might have to skip breakfast.
So, identifying a critical path is important because it helps you to:
-
Prioritize tasks: Identify the tasks that need the most attention to avoid any delays in your process.
-
Identify slack: This is the total amount of time an activity can be delayed without affecting the entire project’s success.
-
Efficiently manage resources: Mapping a critical path reveals where you have flexibility. This allows for more strategic resource allocation. You can assign more experienced team members to high-risk, critical path items to protect the timeline, while utilizing parallel tasks as lower-risk professional development opportunities for others.
-
Visualize dependencies: Diagramming your critical path and its parallel tasks lets you easily see where the dependencies are and what needs to be done when.
-
Plan for the future: Comparing expectations against actual project benchmarks provides a critical feedback loop. These insights allow you to identify recurring bottlenecks, enabling more accurate forecasting and risk mitigation for future projects.
How to find the critical path
You can find the critical path in any type of project using the following process.
Step 1: Identify all tasks and activities
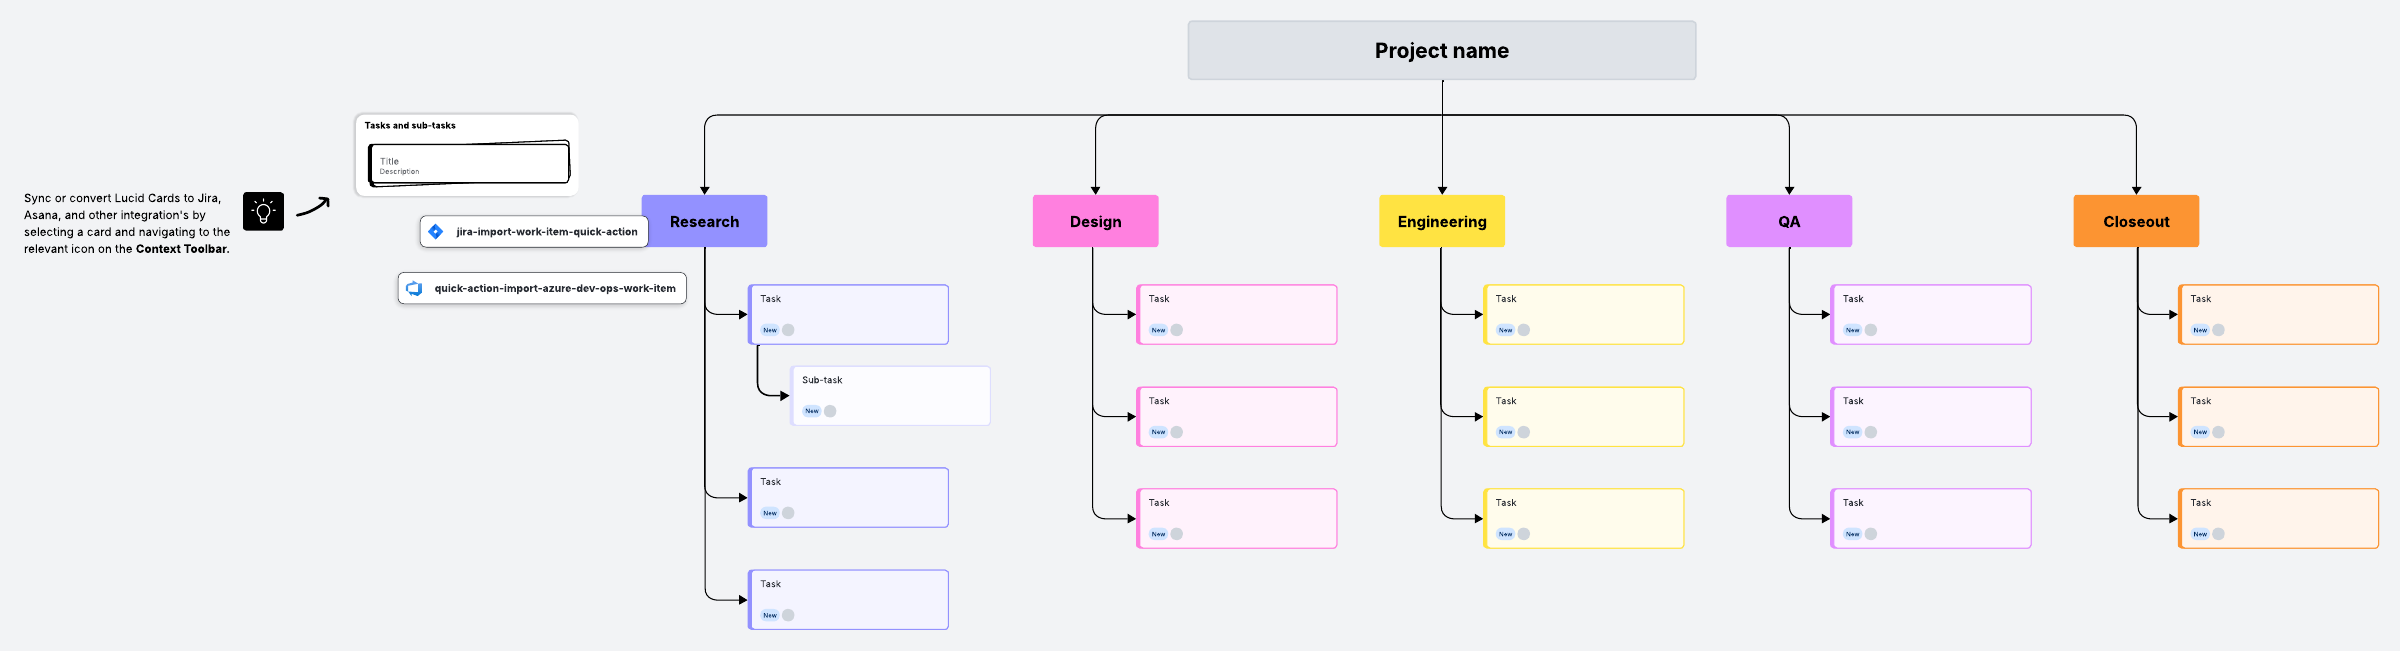
Create a master list of all of the processes, tasks, and activities that need to be completed in your project. A reliable way to do this is with a work breakdown structure. This work breakdown structure template can help you break down a large project into smaller, more manageable processes and tasks to better understand dependencies and how individual elements contribute to the overall project vision.
Step 2: Identify dependency sequences
From your work breakdown structure list, define the proper order of activities, identifying the tasks that can’t start until the previous one is completed. This is a crucial step to avoid possible delays.
Step 3: Estimate time requirements
Estimate the time it will take to complete each task along the critical path. Your estimates can be based on past experience with similar tasks, team member estimations, etc. Consider using PERT to get a more accurate estimate.
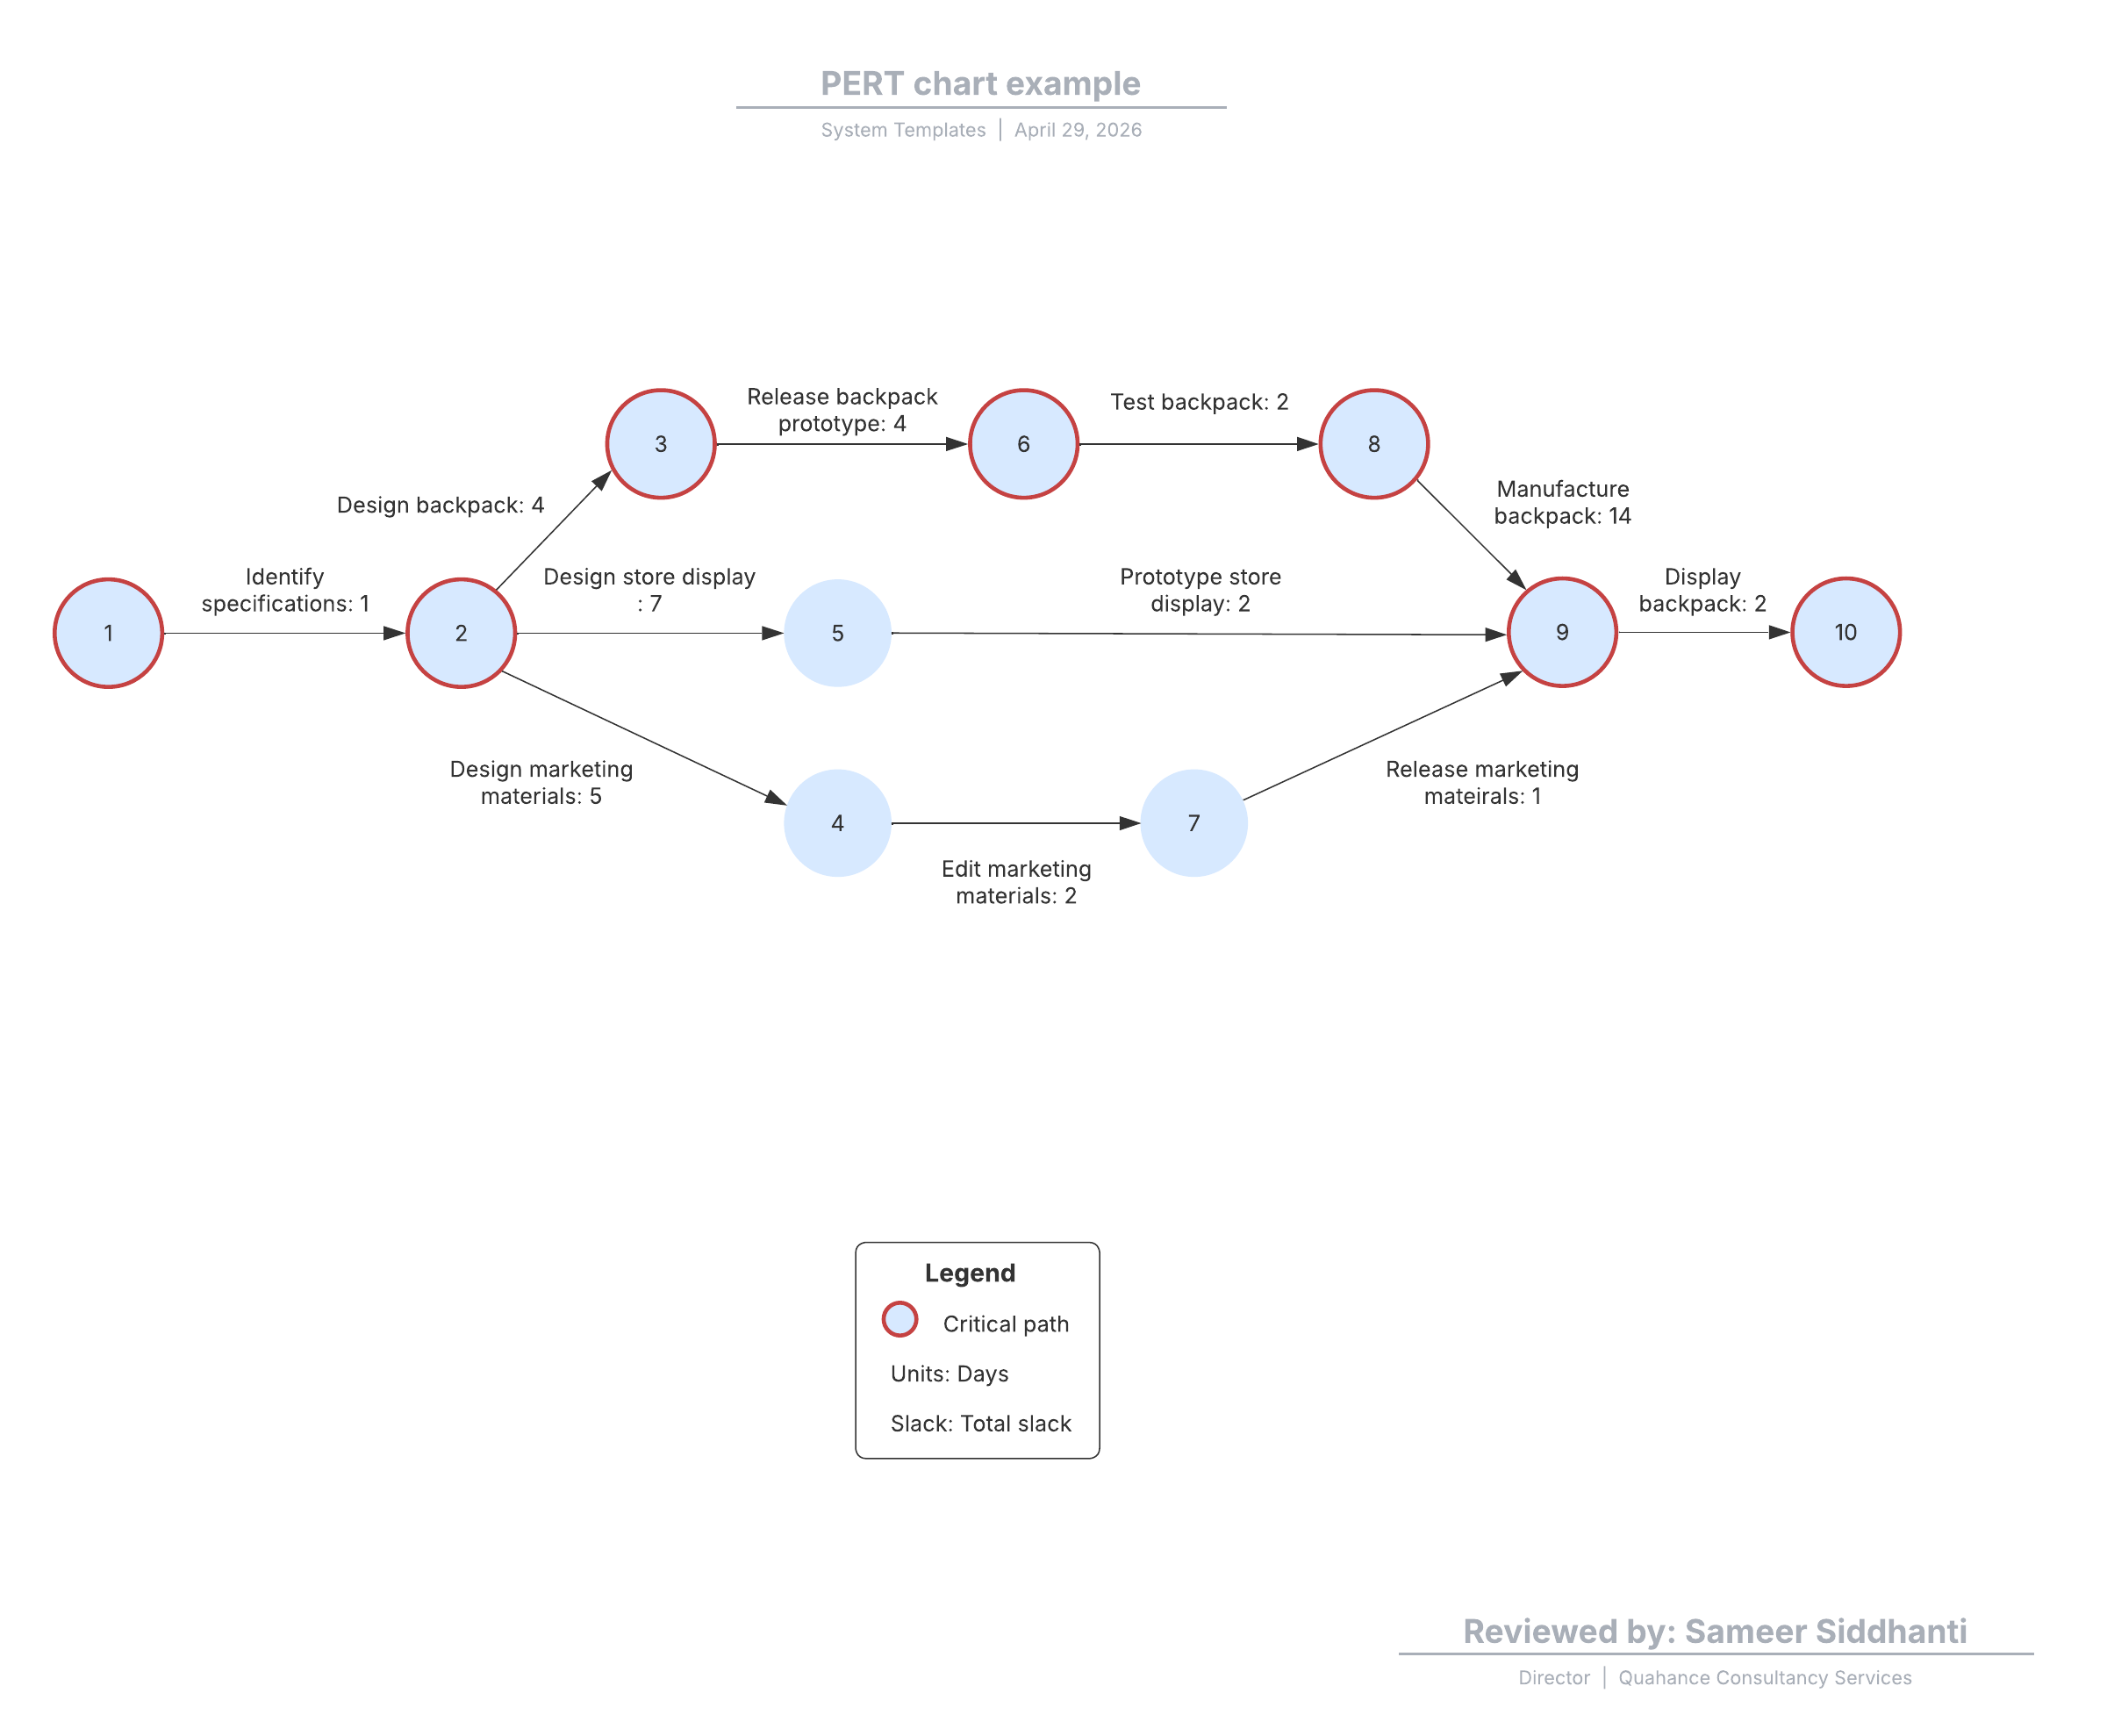
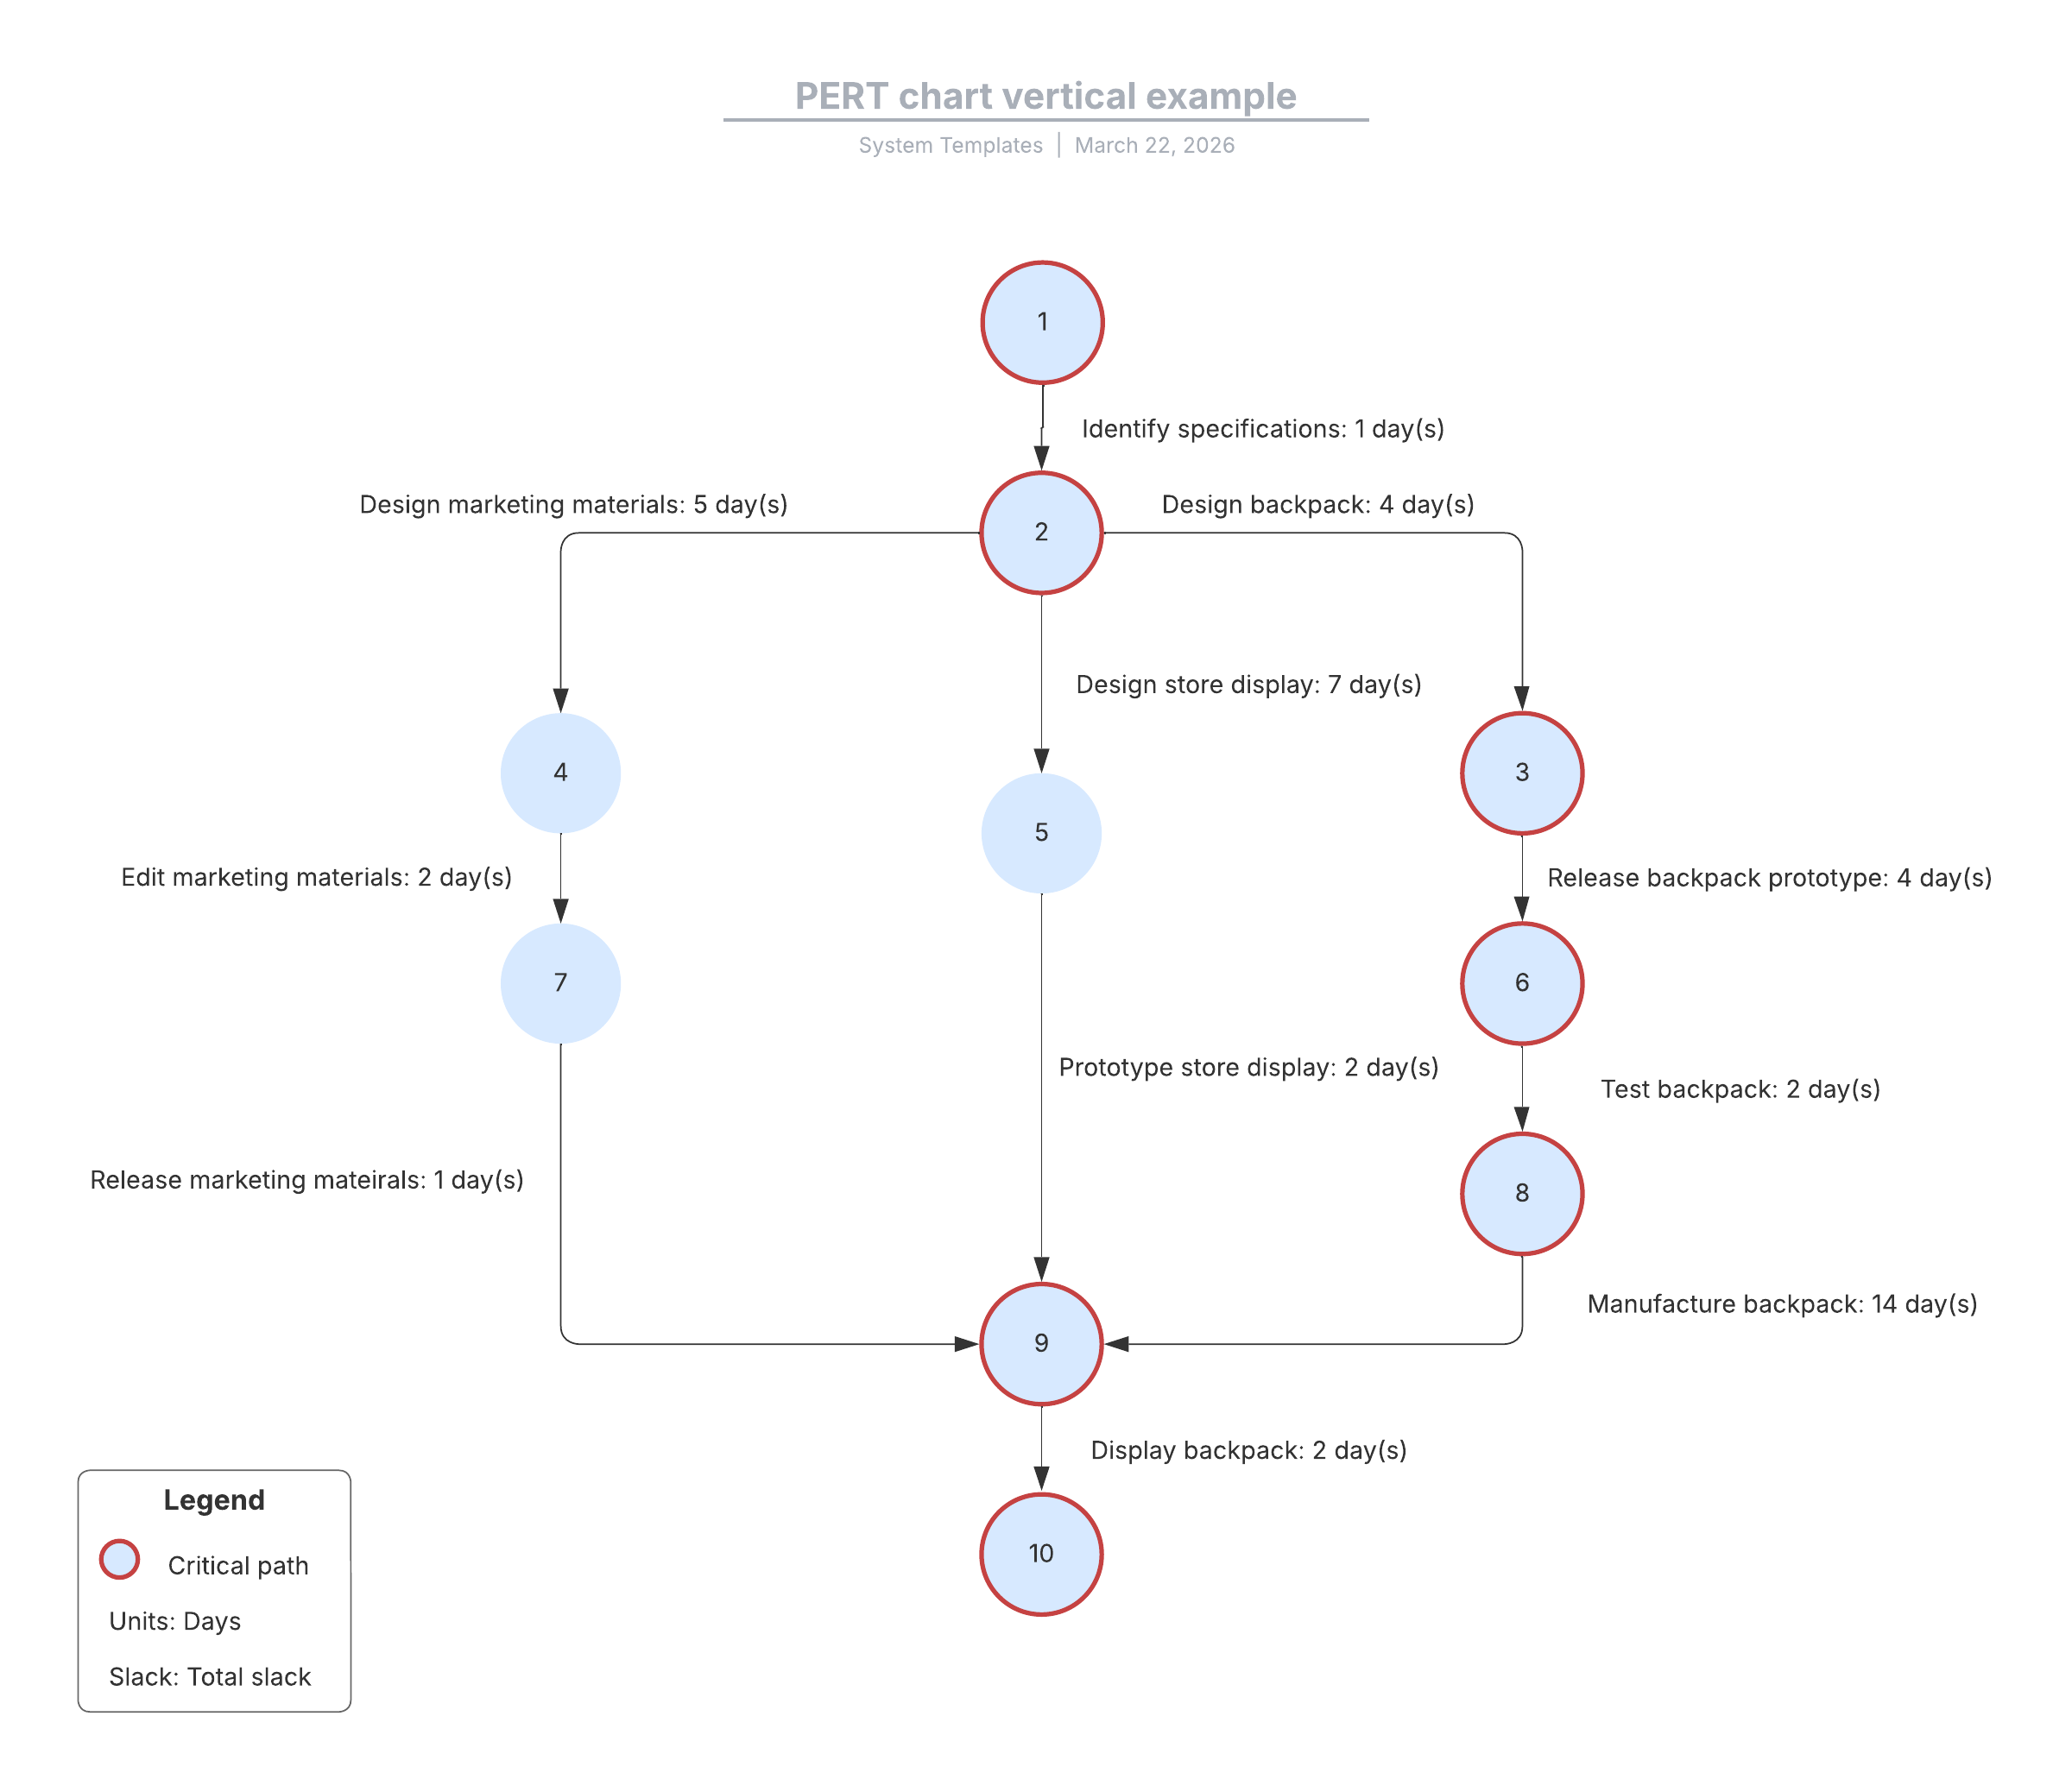
Step 4: Create the critical path diagram
A critical path diagram, or critical path analysis chart, makes it easy for your teams and stakeholders to track progress, map dependencies, and visualize the remaining path to completion.
Step 5: Calculate the critical path
Without accurate completion times, there’s no way to get a full picture of the project’s actual scope. On your critical path diagram, add the start and end times for each task.
The start time for the first task is 0. The end time for that first task represents the duration to complete it. For example, if your first task is estimated to take 20 hours to complete, that is what you’d list as the end time.
The start time for the second task is the end time of the previous task, which was 20 in our example. The second task’s end time is the start time plus its duration. For example, if the second task should take 10 hours, the end time would be 30 hours.
After you have done this for each task, you will know the total estimated time for completing the entire critical path.
Step 6: Monitor the critical path progress, considering slack
With the blueprints of the project in place, all that’s left to do is continue updating the diagram with actual completion time as tasks are completed. By keeping your diagram up to date, you can evaluate if your project is on time and whether you need to make any adjustments.
Remember to consider slack (also called float), which is the maximum time a task in a sequence of dependencies can be delayed before it affects the overall project’s success. By determining where you have slack in a critical path, you can reassign team members to other tasks to keep the work flowing. For example, if a task was estimated to be completed in 20 hours, but it was completed in 10, you potentially have 10 hours of idle time for the resources assigned to that task. You can assign them to other tasks to keep the work moving. You can also use slack to determine how long you can wait before starting a task if the previous task was delayed for some reason.
Visualize your project’s critical path
Mastering a critical path clarifies how every task contributes to the overall goal. By making these dependencies visible, you move from reactive to proactive planning. Using a solution like Lucid makes it easy to create and monitor a critical path chart so you can minimize risk and streamline the path to success.
Everything you need to make a diagram
Make a polished, professional diagram for free with Lucidchart. No matter what you have in mind, we have the tools you need to build it. Make an account and start diagramming today.
Sign up free