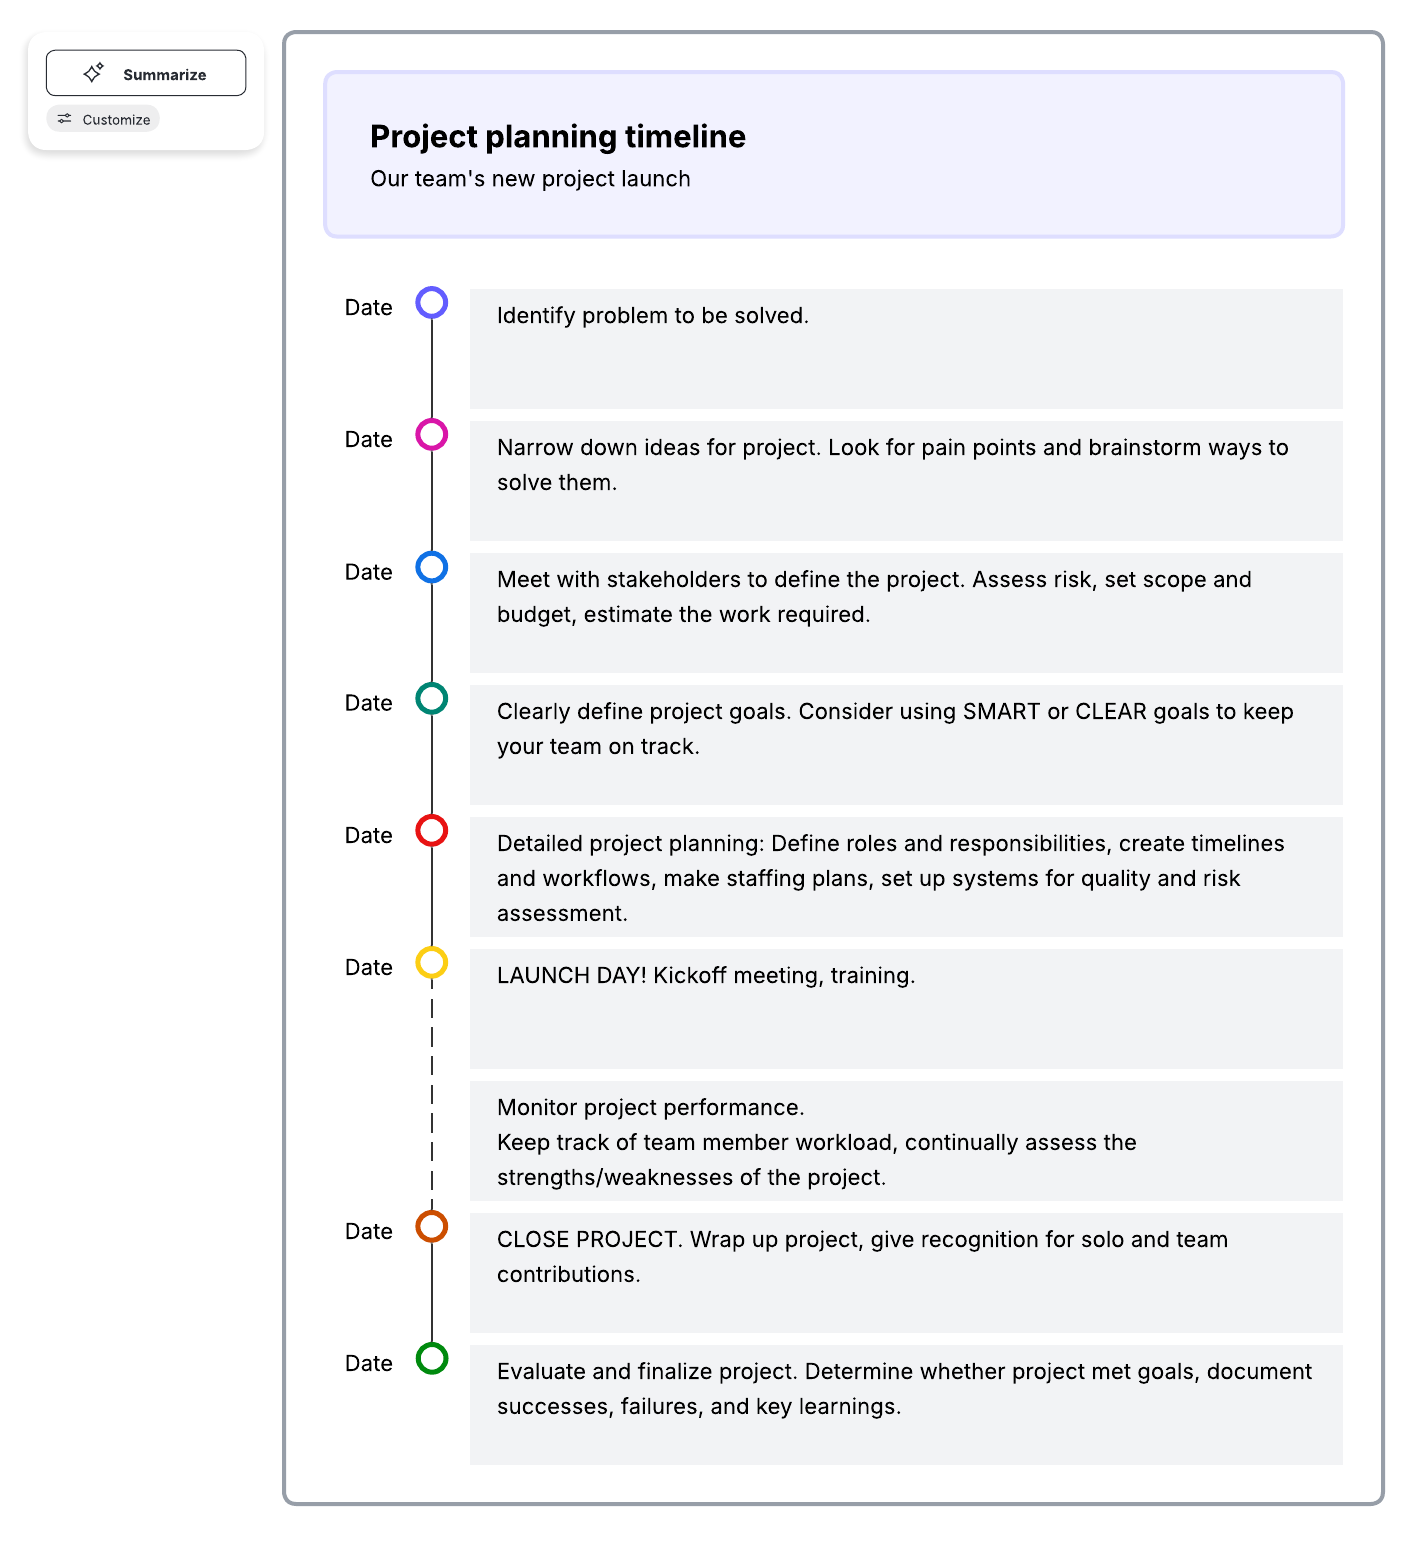
Create a new document in Lucidchart. Start with a customizable timeline template or build your own.
Customize the range, dates, and format of your timeline.
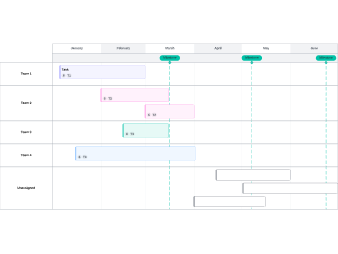
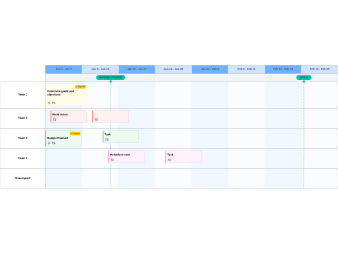
Add important projects, milestones, and due dates.
Install the Lucidchart add-in for Microsoft PowerPoint.
From the add-in, select and insert your timeline into PowerPoint.
Timelines visualize events or important milestones and deadlines within a project, and although you can create a timeline for your own understanding and personal clarity, many people use timelines to effectively share information with others and keep teams and stakeholders on the same page.
So it makes sense that you would want to include your project timeline in a PowerPoint presentation. However, PowerPoint wasn’t designed for users to build out professional visuals: It doesn’t include the necessary shapes or SmartArt, and even if you’re able to throw something together, good luck sharing that timeline elsewhere.
There’s an easier way—learn how to make a timeline in PowerPoint using Lucidchart.
Note: With Lucidspark, our virtual whiteboard application, it's even easier to build out your project timeline with dynamic timeline shapes. Sign up for a free trial.
Insert a timeline in PowerPoint
Now that you’ve created your timeline in Lucidchart, you can embed your work into Microsoft PowerPoint with our free add-in. To install the add-in and insert a timeline in a PPT presentation, follow these steps:
In PowerPoint, select Insert > My Add-ins.
Search for Lucidchart, and once you find Lucidchart Diagrams for PowerPoint, click “Add.”
A log-in screen will appear on your PowerPoint slide. Log in to Lucidchart.
Once you’ve logged in, you’ll see your Documents page. Find your timeline and click “Select.”
Your Lucidchart timeline will appear in the selected PowerPoint slide. You can zoom in and zoom out using the buttons at the bottom of the diagram, and you can still use any interactive elements you have included, such as presentation slides, hotspots, and layers.
To insert diagrams into future PowerPoint presentations, click “My Add-ins” to open the add-in.
If you need to create a new Lucidchart timeline or edit your existing timelines before you add them into your presentation, you can do either from the Documents page in PowerPoint.
Click the orange “+ Document” button to create a new document, or select More > Open on any of your existing documents to edit them. A new window will open where you can edit your document in the Lucidchart editor. Once you’re finished, press “Save and Close” to return to PowerPoint.
Whenever you make changes to an inserted document, remember to click the refresh button at the bottom of your timeline to reload it.
Now that you know how to do a timeline in PowerPoint, you can use Lucidchart to create other visuals, from simple flowcharts to complex technical diagrams, to liven up any presentation and ensure understanding. Try it today!
Clarify project timelines and align teams by creating a timeline in Lucidspark. Start your free account.